Download the Driver
Browser to the Prolific site to download the driver and install it. Here’s the URL at the time of this writing:
http://www.prolific.com.tw/us/showproduct.aspx?p_id=229&pcid=41
Discover Driver Numbers
The driver will need them so that it can be associated with your USB device. Click on Apple -> About This Mac and and click System Report. Select USB and scroll until you find your Prolific USB device. It should look something like this:
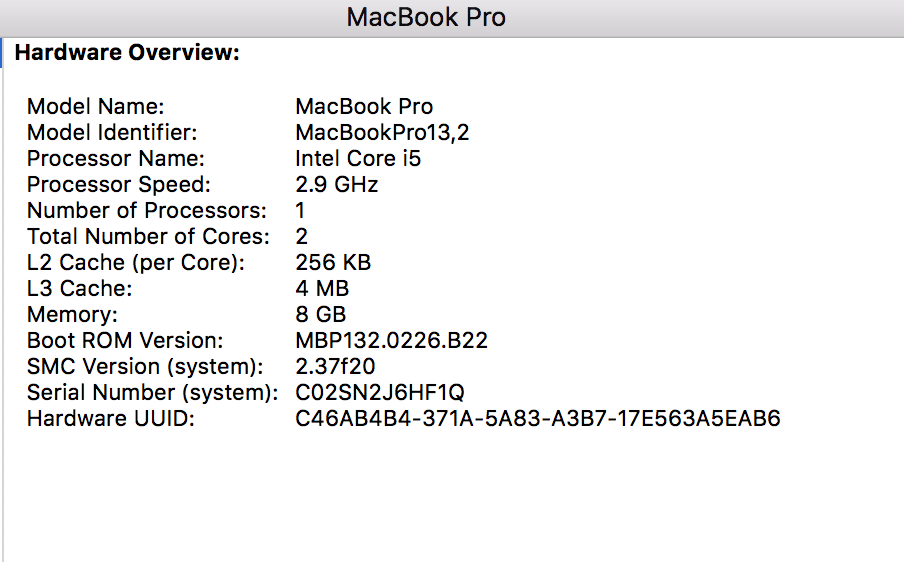
note the Product ID and Vendor ID (circled in red). We will be adding these to the driver.
Hex to Decimal Conversion
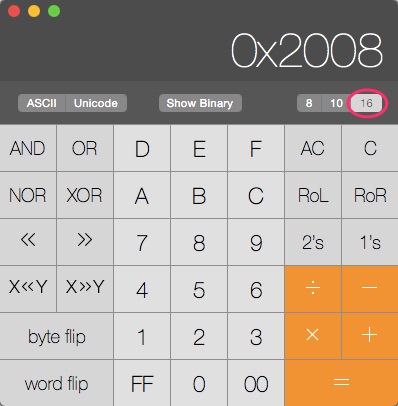
We need to convert the hex numbers to decimal. An easy way to do that is to run Calculator and hit Command-3. Click the “16” above the clear button to switch to hex and enter the number you want to convert (like 0x2008 from the example). Now click the 10 and you have the hex to decimal conversion. If you used 0x2008, you should get 8200. You need to convert both the product and vendor IDs.
Edit the Driver
Fire up your favorite terminal emulator and head here:
cd /System/Library/Extensions/ProlificUsbSerial.kext/Contents
At this point, you will need to either fire off a root shell or sudo everything.
Edit Info.plist with your editor of choice. Scroll down and you will find a section that looks like this:
<key>067B_2303</key>
<dict>
<key>CFBundleIdentifier</key>
<string>com.prolific.driver.PL2303</string>
<key>IOClass</key>
<string>com_prolific_driver_PL2303</string>
<key>IOProviderClass</key>
<string>IOUSBInterface</string>
<key>bConfigurationValue</key>
<integer>1</integer>
<key>bInterfaceNumber</key>
<integer>0</integer>
<key>idProduct</key>
<integer>8963</integer>
<key>idVendor</key>
<integer>1659</integer>
</dict>
What you want to do is copy and paste that section. So if your vendor ID was 0x2478 for ATEN with a product ID of 0x2008, you can change the key for your new section to:
<key>0557_2008</key>
<dict>
<key>CFBundleIdentifier</key>
<string>com.prolific.driver.PL2303</string>
<key>IOClass</key>
<string>com_prolific_driver_PL2303</string>
<key>IOProviderClass</key>
<string>IOUSBInterface</string>
<key>bConfigurationValue</key>
<integer>1</integer>
<key>bInterfaceNumber</key>
<integer>0</integer>
<key>idProduct</key>
<integer>8200</integer>
<key>idVendor</key>
<integer>1367</integer>
</dict>
Now you need to unload and reload the driver to load the new settings:
$ kextunload /System/Library/Extensions/ProlificUsbSerial.kext
$ kextload /System/Library/Extensions/ProlificUsbSerial.kext

if the above doesn't work you'll need to do the following and repeat the above
To boot into recovery mode, restart your Mac and hold Command+R as it boots. You’ll enter the recovery environment. Click the “Utilities” menu and select “Terminal” to open a terminal window.

Type the following command into the terminal and press Enter to check the status:
csrutil status
You’ll see whether System Integrity Protection is enabled or not.

To disable System Integrity Protection, run the following command:
csrutil disable
Once you have done the above you can re-install the driver and once the USB to Serial is working you can re-protect your mac
If you decide you want to enable SIP later, return to the recovery environment and run the following command:
csrutil enable

Restart your Mac and your new System Integrity Protection setting will take effect. The root user will now have its full, unrestricted access to the entire operating system and every file.
you should now have the usb to serial adapter working 🙂